Monitor Server Health: Proactive Tools & OpsSqad Automation 2026
Master server monitoring in 2026. Learn manual tools like Prometheus & Grafana, then automate diagnostics & debugging with OpsSqad's AI agents.
Mastering Server Monitoring Tool Server: A 2026 Guide to Proactive IT Health
What is Server Monitoring and Why Does It Matter in 2026?
Server monitoring is the continuous process of tracking, analyzing, and alerting on the health, performance, and availability of physical and virtual servers across your infrastructure. In 2026, effective server monitoring means collecting metrics from CPU, memory, disk, network, and application layers, correlating this data to identify issues before they impact users, and maintaining detailed audit trails for compliance and troubleshooting.
TL;DR: Server monitoring in 2026 extends far beyond simple uptime checks. Modern monitoring encompasses real-time performance metrics, security posture assessment, application-level observability, and AI-driven anomaly detection across hybrid cloud environments. The average cost of IT downtime in 2026 exceeds $9,000 per minute for enterprise organizations, making proactive monitoring not just a technical necessity but a critical business investment.
The Evolving Landscape of IT Infrastructure Health
In 2026, IT infrastructure is more complex and distributed than ever. From on-premise data centers to multi-cloud environments, edge devices, and containerized applications, maintaining optimal performance and availability is a constant challenge. The average enterprise now manages servers across 3.7 different cloud providers, according to 2026 infrastructure surveys, while simultaneously maintaining legacy on-premise systems.
Server monitoring is no longer just about checking if a server is "up" or "down"; it's a critical discipline for ensuring application performance, user experience, security, and ultimately, business continuity. Modern infrastructure spans Kubernetes clusters, serverless functions, traditional VMs, bare-metal servers, and edge computing nodes—all requiring unified visibility.
The shift to remote work, which solidified in the early 2020s, has made reliable server infrastructure even more critical. When your workforce is distributed globally, server downtime doesn't just affect one office—it impacts your entire organization simultaneously.
Defining Server Monitoring: Beyond Basic Uptime Checks
Server monitoring encompasses the continuous observation and analysis of various aspects of a server's operation. This includes hardware health, operating system performance, application responsiveness, network connectivity, and security posture. The goal is to detect issues proactively, diagnose them quickly, and prevent them from impacting end-users or business operations.
Modern monitoring tools collect hundreds of metrics per server, including:
- Resource utilization: CPU load, memory consumption, disk I/O, network throughput
- Application performance: Request rates, error rates, response times, queue depths
- System health: Process states, service availability, hardware sensor data
- Security indicators: Failed authentication attempts, unusual network connections, file integrity changes
- Business metrics: Transaction volumes, user sessions, revenue-impacting events
The most effective monitoring strategies in 2026 combine these technical metrics with business context, allowing teams to prioritize issues based on actual user impact rather than arbitrary thresholds.
The Cost of Downtime in 2026: More Than Just Lost Revenue
Downtime in 2026 carries significant financial and reputational costs. Beyond direct revenue loss, it can lead to customer churn, damage brand perception, and incur regulatory penalties. Industry data from 2026 shows that:
- The average cost of IT downtime is $9,000 per minute for enterprise organizations
- E-commerce sites lose an average of $11,000 per minute during outages
- 94% of companies experiencing catastrophic data loss never fully recover
- The average time to detect an issue without proper monitoring is 206 minutes
- With effective monitoring, mean time to detection (MTTD) drops to under 5 minutes
Proactive monitoring is an investment that directly mitigates these risks. Organizations with mature monitoring practices report 67% faster incident resolution times and 43% fewer critical incidents compared to those relying on reactive approaches.
Key Takeaways
- Server monitoring in 2026 requires tracking metrics across CPU, memory, disk, network, application, and security layers to maintain optimal performance and prevent costly downtime.
- The average cost of enterprise IT downtime exceeds $9,000 per minute, making proactive monitoring a critical business investment rather than just a technical requirement.
- Modern monitoring tools leverage AI and machine learning for anomaly detection, predictive analytics, and automated root cause analysis, reducing mean time to resolution by up to 67%.
- Open-source solutions like Prometheus, Grafana, and Zabbix offer powerful capabilities for teams with technical expertise, while commercial platforms provide integrated experiences with dedicated support.
- Effective monitoring strategies combine technical metrics with business context, allowing teams to prioritize issues based on actual user impact across hybrid cloud and on-premise environments.
- The evolution from traditional monitoring to full observability—encompassing logs, metrics, and traces—enables DevOps teams to understand complex distributed systems and diagnose issues faster.
- Implementing comprehensive server monitoring typically reduces mean time to detection from over 200 minutes to under 5 minutes, dramatically improving service reliability and user experience.
Key Server Metrics to Monitor for Optimal Performance
Core System Metrics: CPU Load, Memory Usage, and Disk I/O
Understanding the fundamental resource utilization of your servers is paramount. These three metrics form the foundation of server health monitoring and often provide the first indication of performance issues.
CPU Load: The Processing Power Indicator
High CPU load can indicate inefficient code, runaway processes, or insufficient processing power. CPU monitoring reveals not just overall utilization but also load distribution across cores and which processes consume the most cycles.
Command Example (Linux):
top -bn1 | head -20Output Interpretation:
The top command displays real-time CPU usage. Look for the %Cpu(s) line showing user space, system, idle, and wait percentages. Load averages (1, 5, and 15 minutes) appear in the first line. A load average higher than your CPU core count indicates saturation.
top - 14:23:01 up 45 days,  3:21,  2 users,  load average: 2.45, 1.89, 1.67
Tasks: 247 total,   2 running, 245 sleeping,   0 stopped,   0 zombie
%Cpu(s): 67.3 us,  8.2 sy,  0.0 ni, 23.1 id,  0.8 wa,  0.0 hi,  0.6 si,  0.0 st
Troubleshooting:
When CPU usage consistently exceeds 80%, identify the consuming processes with ps aux --sort=-%cpu | head -10. Consider whether the workload is legitimate (scale horizontally or vertically) or if there's a runaway process that needs investigation.
Warning: CPU steal time (st in top output) indicates your virtual machine is waiting for the hypervisor to allocate CPU cycles. High steal time (above 10%) suggests the physical host is overcommitted—contact your hosting provider.
Memory Usage: Avoiding the Swap Death Spiral
Excessive memory consumption can lead to swapping, which severely degrades performance. When a system runs out of physical RAM, it writes memory pages to disk—a process thousands of times slower than accessing RAM.
Command Example (Linux):
free -hOutput Interpretation:
              total        used        free      shared  buff/cache   available
Mem:           15Gi       8.2Gi       1.1Gi       324Mi       6.1Gi       6.4Gi
Swap:         2.0Gi       1.2Gi       820Mi
The available column is most important—it shows memory available for new applications without swapping. If swap usage is high and growing, you have a memory pressure problem.
Troubleshooting:
Identify memory-consuming processes with ps aux --sort=-%mem | head -10. Look for memory leaks—processes whose memory usage grows over time without bound. Applications with memory leaks require restart or code fixes.
Note: Linux uses available memory for disk caching (buff/cache), which is normal and beneficial. This memory is immediately available when applications need it.
Disk I/O: The Hidden Performance Killer
Slow disk read/write operations can bottleneck applications even when CPU and memory are underutilized. Database servers, log aggregators, and file servers are particularly sensitive to disk I/O performance.
Command Example (Linux):
iostat -xz 1 5Output Interpretation:
Device            r/s     w/s     rkB/s     wkB/s   %util
sda             45.23   89.67   1234.56   3456.78   87.34
The %util column shows how saturated the device is. Values consistently above 80% indicate the disk is a bottleneck. High await values (average time for I/O requests) suggest slow storage.
Troubleshooting:
Identify processes causing I/O with iotop -o. Consider optimizing database queries, implementing caching layers, or upgrading to faster storage (NVMe SSDs). For cloud environments, ensure you're using provisioned IOPS volumes for database workloads.
Network Performance: Latency, Throughput, and Packet Loss
Network issues can be as detrimental as server resource constraints. In distributed architectures common in 2026, network performance directly impacts application responsiveness.
Latency: The Speed of Communication
Latency is the time it takes for data to travel between two points. High latency impacts real-time applications, API response times, and user experience. In 2026, users expect sub-100ms response times for interactive applications.
Command Example (Linux):
ping -c 10 google.comOutput Interpretation:
64 bytes from lga34s34-in-f14.1e100.net (142.250.80.46): icmp_seq=1 ttl=117 time=12.3 ms
--- google.com ping statistics ---
10 packets transmitted, 10 received, 0% packet loss, time 9013ms
rtt min/avg/max/mdev = 11.234/12.567/15.234/1.123 ms
Focus on the average (avg) round-trip time. Sudden spikes or high standard deviation (mdev) indicate network instability.
Troubleshooting:
Use mtr google.com for continuous monitoring that shows which network hop introduces latency. High latency at your router suggests local network issues; latency appearing at your ISP's equipment requires contacting them.
Throughput: Bandwidth Capacity
Throughput measures the amount of data transferred over a period. Low throughput affects large data transfers, backup operations, and applications serving media content.
Command Example (Linux):
# Install iperf3 first: apt-get install iperf3
# On server: iperf3 -s
# On client: iperf3 -c server-ip -t 30
Output Interpretation:
[ ID] Interval           Transfer     Bitrate         Retr
[  5]   0.00-30.00  sec  3.25 GBytes   931 Mbits/sec    0             sender
[  5]   0.00-30.00  sec  3.24 GBytes   929 Mbits/sec                  receiver
Compare actual throughput against your expected network capacity. Significantly lower values indicate network congestion, misconfigured interfaces, or bandwidth throttling.
Troubleshooting:
Check interface errors with ethtool -S eth0 | grep errors. Non-zero error counts suggest hardware issues, cable problems, or duplex mismatches.
Packet Loss: The Silent Application Killer
Packet loss occurs when data packets fail to reach their destination. Even 1-2% packet loss can severely impact TCP performance due to retransmissions.
Command Example (Linux):
mtr --report --report-cycles 100 google.comOutput Interpretation:
HOST: myserver                    Loss%   Snt   Last   Avg  Best  Wrst StDev
  1.|-- 192.168.1.1                0.0%   100    0.8   0.9   0.7   2.1   0.2
  2.|-- 10.0.0.1                   0.0%   100    8.2   8.5   7.9  12.3   0.8
  3.|-- isp-router.net             2.0%   100   12.3  12.8  11.2  18.9   1.4
Packet loss at any hop is problematic. Loss at your router or switch indicates local hardware issues; loss at ISP equipment requires provider intervention.
Warning: Packet loss compounds in distributed systems. If three microservices communicate sequentially and each connection has 1% loss, the end-to-end success rate drops to 97.03%, not 99%.
Application-Specific Metrics and Logs
Beyond system resources, monitoring application health is crucial. Application metrics provide insight into user experience and business impact that system metrics alone cannot reveal.
Log Analysis: Finding Needles in Haystacks
Centralizing and analyzing application logs for errors, warnings, and critical events helps identify issues before they escalate. In 2026, the average application generates 50-100 GB of logs daily.
Command Example (Linux):
grep -i "error\|exception\|fatal" /var/log/myapp.log | tail -50Output Interpretation: Look for patterns—repeated errors from the same function, errors correlating with specific times, or error rate increases. A single error might be noise; hundreds per minute indicate a systemic problem.
Troubleshooting:
Use awk '{print $1,$2}' /var/log/myapp.log | sort | uniq -c | sort -nr to count error frequency by type. The most common errors should be addressed first.
For production environments, consider centralized logging solutions like the ELK stack (Elasticsearch, Logstash, Kibana) or Grafana Loki, which make searching across thousands of servers practical.
Application Performance Metrics (APM)
Tracking metrics like request latency, throughput, and error rates at the application level provides the most direct measure of user experience.
Key application metrics to monitor:
- Request rate: Requests per second helps identify traffic patterns and capacity needs
- Error rate: Percentage of requests resulting in errors (aim for less than 0.1% in production)
- Response time: P50, P95, and P99 latency percentiles (median, 95th, 99th percentile)
- Saturation: Queue depth, thread pool utilization, connection pool usage
Note: Always monitor percentiles, not just averages. An average response time of 100ms sounds good, but if the P99 is 10 seconds, 1% of your users have a terrible experience.
Security Metrics: Failed Logins, Unusual Activity, and Vulnerability Scans
Monitoring for security threats is an integral part of server management. Security monitoring in 2026 focuses on detecting anomalies that indicate compromise rather than just blocking known threats.
Failed Login Attempts: Detecting Brute Force Attacks
Failed authentication attempts often indicate automated attacks attempting to guess credentials. Monitoring these patterns helps identify attacks early.
Command Example (Linux):
grep "Failed password" /var/log/auth.log | awk '{print $(NF-3)}' | sort | uniq -c | sort -nr | head -10Output Interpretation:
    247 192.168.1.45
     89 10.0.0.23
     12 203.0.113.67
This shows IP addresses with the most failed login attempts. Hundreds of failures from a single IP indicate a brute-force attack.
Troubleshooting: Implement fail2ban or similar tools to automatically block IPs after repeated failures. Enable multi-factor authentication for all administrative access. Consider moving SSH to a non-standard port (security through obscurity, but it reduces automated scans).
Unusual Process Activity
Identifying unexpected processes or network connections can reveal compromised systems. Baseline your normal process list and alert on deviations.
Command Example (Linux):
# List processes with network connections
netstat -tulpn | grep ESTABLISHED
Look for processes you don't recognize, especially those listening on unusual ports or connecting to unexpected external IPs. Cryptocurrency miners, botnet clients, and backdoors all create unusual network patterns.
Choosing the Right Server Monitoring Tool for Your 2026 Needs
Understanding the Spectrum: Open Source vs. Commercial Solutions
The choice between open-source and commercial monitoring tools is a significant one, each with its own set of advantages and disadvantages. In 2026, the lines have blurred somewhat—many open-source tools offer commercial support options, while commercial vendors often open-source components of their platforms.
Open-source solutions typically offer:
- No licensing costs (though implementation and maintenance have costs)
- Full control over data and deployment
- Flexibility to customize and extend
- Strong community support and rapid innovation
- Ability to self-host for data sovereignty
Commercial solutions typically offer:
- Faster time to value with less configuration
- Integrated platforms (metrics, logs, traces in one place)
- Dedicated support teams and SLAs
- Advanced features like AI-driven analytics
- Managed infrastructure (for SaaS offerings)
The decision often comes down to team expertise, budget, and specific requirements. Organizations with strong DevOps teams often prefer open-source for the flexibility; those wanting to minimize operational overhead lean toward commercial SaaS solutions.
Popular Open Source Monitoring Tools: Comparison & Use Cases
Open-source solutions offer flexibility, cost-effectiveness, and a strong community. However, they often require more in-house expertise for setup and maintenance. Here's a detailed comparison of the leading options in 2026.
Prometheus & Grafana: The Cloud-Native Standard
Prometheus and Grafana have become the de facto standard for monitoring cloud-native infrastructure, particularly Kubernetes environments. Prometheus handles metrics collection and storage, while Grafana provides visualization.
Prometheus Pros:
- Excellent for metrics collection with a pull-based model that works well in dynamic environments
- Flexible querying with PromQL, a powerful query language for time-series data
- Strong community support with extensive documentation and thousands of exporters
- Native Kubernetes integration with service discovery
- Efficient time-series database optimized for high-cardinality data
- Built-in alerting with Alertmanager
Prometheus Cons:
- Primarily focused on metrics; requires additional tools (Loki for logs, Jaeger for traces)
- Limited long-term storage capabilities without external solutions like Thanos or Cortex
- Steeper learning curve for PromQL compared to simpler query languages
- No built-in authentication or multi-tenancy (requires reverse proxy setup)
- Pull-based model requires network access to targets
Grafana Pros:
- Beautiful and highly customizable dashboards with rich visualization options
- Supports numerous data sources beyond Prometheus (Elasticsearch, InfluxDB, MySQL, etc.)
- Excellent for visualizing time-series data with powerful templating
- Active development with frequent feature releases
- Strong plugin ecosystem for extending functionality
- Improved alerting capabilities in recent versions
Grafana Cons:
- Primarily a visualization tool; relies on other backends for data collection and storage
- Can become complex to manage with many dashboards and data sources
- Performance can degrade with very complex queries or many concurrent users
- Alert management less mature than dedicated alerting platforms
Use Case: Monitoring microservices architectures, Kubernetes clusters, and dynamic cloud environments. If you're running containerized workloads in 2026, Prometheus and Grafana should be your starting point.
Zabbix: The Enterprise Workhorse
Zabbix is a mature and feature-rich enterprise-grade monitoring solution that has been continuously developed since 2001. It excels at monitoring traditional infrastructure alongside modern cloud resources.
Zabbix Pros:
- Comprehensive monitoring capabilities covering metrics, logs, and network devices
- Robust alerting system with flexible escalation policies and multiple notification channels
- Both agent-based and agentless monitoring (SNMP, IPMI, JMX, SSH)
- Good for monitoring diverse infrastructure including legacy systems
- Auto-discovery capabilities for network devices and services
- Built-in maps and visualization tools
- Strong template system for standardizing monitoring across similar systems
Zabbix Cons:
- Can be resource-intensive for large deployments (database grows quickly)
- UI feels dated compared to modern tools, though improvements continue
- Complex configuration for large deployments with many templates
- Learning curve for advanced features
- Less suited for highly dynamic containerized environments compared to Prometheus
Use Case: Monitoring diverse IT infrastructure including servers, network devices, databases, and applications. Particularly strong for organizations with significant traditional infrastructure alongside cloud resources.
Nagios: The Reliable Veteran
Nagios is one of the oldest and most established open-source monitoring systems, first released in 1999. Its longevity speaks to its reliability, though it shows its age in some areas.
Nagios Pros:
- Highly stable and reliable with decades of production use
- Extensive plugin ecosystem (thousands of community plugins)
- Good for critical infrastructure monitoring where stability is paramount
- Well-understood by many IT professionals
- Flexible alerting and notification system
- Can monitor virtually anything with the right plugin
Nagios Cons:
- Configuration is complex and entirely file-based (no GUI for config)
- Alerting can be less sophisticated than newer tools
- Basic UI that hasn't evolved much over the years
- Requires significant effort to set up and maintain
- Not designed for modern containerized or cloud-native environments
- Scaling to thousands of hosts requires careful architecture
Use Case: Monitoring critical servers and services where stability and reliability are more important than modern features. Organizations with existing Nagios expertise and investment.
Netdata: The Real-Time Performance Monitor
Netdata focuses on real-time performance monitoring with minimal configuration. It's designed to be installed on every server and provide immediate visibility.
Netdata Pros:
- Extremely easy to set up—one-line installation script
- Real-time dashboards available immediately without configuration
- Low resource overhead despite collecting thousands of metrics per second
- Auto-discovers services and creates relevant dashboards automatically
- Per-second granularity for troubleshooting performance issues
- Beautiful, responsive web interface
- Can run entirely distributed or stream to parent nodes
Netdata Cons:
- Primarily focused on performance metrics rather than comprehensive monitoring
- Less emphasis on long-term historical data aggregation compared to Prometheus or Zabbix
- Alerting capabilities are more basic than dedicated monitoring platforms
- Limited integration with external systems compared to more established tools
Use Case: Real-time performance troubleshooting and monitoring of individual servers. Excellent complement to other monitoring tools for deep-dive performance analysis. Perfect for developers who need immediate visibility into server performance.
Commercial Monitoring Tools: When to Consider Them
Commercial tools often provide a more integrated experience, dedicated support, and advanced features out-of-the-box, but come with subscription costs that scale with usage.
Datadog: The Cloud-Native Observability Leader
Datadog has become one of the most popular SaaS-based monitoring and analytics platforms, particularly for cloud-native organizations.
Datadog Pros:
- Unified platform for logs, metrics, traces, and security monitoring
- Excellent integrations with cloud providers (AWS, Azure, GCP) and hundreds of technologies
- Powerful AI-driven anomaly detection and forecasting
- User-friendly interface with minimal learning curve
- Strong APM capabilities with distributed tracing
- Real-time collaboration features
- Managed service eliminates infrastructure overhead
Datadog Cons:
- Can become expensive at scale (pricing based on hosts, containers, and data volume)
- Vendor lock-in with proprietary agents and query language
- Data egress costs can be significant for high-volume environments
- Limited customization compared to self-hosted solutions
Use Case: Comprehensive observability for cloud-native applications and infrastructure. Best for organizations prioritizing speed of implementation and integrated features over cost optimization.
Pricing Note (2026): Datadog's infrastructure monitoring starts at $15 per host per month, with APM adding $31 per host. Costs increase significantly with log management and custom metrics. A typical mid-size deployment (100 hosts) runs $5,000-$10,000 monthly.
New Relic: The Application Performance Specialist
New Relic offers a comprehensive observability platform with particularly strong application performance monitoring capabilities.
New Relic Pros:
- Deep APM capabilities with code-level visibility
- Strong focus on user experience monitoring (Real User Monitoring)
- Integrated platform covering infrastructure, applications, logs, and traces
- Generous free tier for small teams
- Good mobile application monitoring
- AI-powered incident intelligence
New Relic Cons:
- Pricing can be complex to predict (based on data ingested and users)
- Can be overwhelming to configure for specific needs
- Some features require learning New Relic's query language (NRQL)
- Less strong in infrastructure monitoring compared to application monitoring
Use Case: Application performance optimization and end-to-end visibility for complex applications. Particularly valuable for organizations where application performance directly impacts revenue.
Pricing Note (2026): New Relic moved to consumption-based pricing. The free tier includes 100 GB data ingest monthly. Standard tier is $0.30 per GB ingested, plus $99 per user monthly. Enterprise deployments typically run $15,000-$50,000 monthly.
SolarWinds: The Traditional Infrastructure Specialist
SolarWinds offers a broad suite of IT management and monitoring tools, traditionally strong in network monitoring and on-premise infrastructure.
SolarWinds Pros:
- Comprehensive IT management capabilities beyond just monitoring
- Strong network monitoring and management features
- Good for on-premise and hybrid environments
- Detailed reporting and compliance features
- Mature product with extensive features
SolarWinds Cons:
- Can be complex to navigate with many separate products
- Licensing can be intricate and expensive
- Less cloud-native focused than competitors
- Primarily Windows-based servers for the monitoring infrastructure
- Slower to adopt modern observability practices
Use Case: Integrated IT infrastructure management for large enterprises with significant traditional infrastructure. Strong choice for network-heavy environments.
Dotcom-Monitor: The External Monitoring Specialist
Dotcom-Monitor focuses on website and application performance monitoring from an external perspective, emphasizing uptime and user experience.
Dotcom-Monitor Pros:
- Excellent for uptime and performance monitoring of public-facing services
- Global monitoring locations (40+ worldwide in 2026) for geographic performance testing
- Synthetic transaction monitoring for complex user workflows
- Good for SLA monitoring and reporting
- No infrastructure to maintain
Dotcom-Monitor Cons:
- Less focused on internal server infrastructure monitoring
- Limited visibility into application internals
- More expensive than some alternatives for basic uptime monitoring
- Primarily focused on HTTP/HTTPS services
Use Case: Ensuring the availability and performance of websites and web applications from the end-user perspective. Excellent complement to internal monitoring tools.
Key Features to Look For in a Monitoring Tool
When evaluating monitoring tools in 2026, consider these essential features:
Metrics Collection: The ability to gather a wide range of system and application metrics with minimal performance impact. Look for support for custom metrics and high-cardinality data (many unique label combinations).
Alerting & Notifications: Robust and customizable alerting rules with various notification channels (email, Slack, PagerDuty, Microsoft Teams). Advanced features include alert grouping, suppression during maintenance windows, and escalation policies.
Visualization & Dashboards: Intuitive dashboards for real-time and historical data analysis. The ability to create custom dashboards quickly and share them across teams is essential.
Log Management: Centralized log aggregation and searching capabilities. In 2026, effective log management means handling terabytes of logs daily with fast search and correlation with metrics.
Traceability (Observability): The ability to trace requests across distributed systems. Distributed tracing has become essential for debugging microservices architectures.
Scalability: The tool's ability to handle growing infrastructure. Consider both vertical scaling (monitoring more metrics per server) and horizontal scaling (monitoring more servers).
Ease of Use & Deployment: How quickly can you get it up and running? Time to first dashboard is a critical metric. Look for auto-discovery and intelligent defaults.
Integrations: Compatibility with your existing tools and cloud providers. Check for native integrations with your cloud provider, container orchestration platform, CI/CD tools, and incident management systems.
Security: How is the monitoring data secured? What are the access controls? Look for encryption in transit and at rest, role-based access control, and audit logging.
Pricing Model: Understanding the cost structure, especially for commercial tools. Hidden costs include data egress, custom metrics, and additional features.
Comparing Pricing Models for Commercial Tools
While a deep dive into every pricing model is beyond this article's scope, understanding common structures helps you estimate costs:
Per-host/agent pricing: You pay for each server or agent monitored. Simple to understand but can become expensive with containerized environments where hosts are ephemeral. Example: Datadog's infrastructure monitoring at $15/host/month.
Data volume pricing: Cost is based on the amount of data ingested or stored. More predictable for high-density environments but requires careful monitoring of data volume. Example: New Relic at $0.30/GB ingested.
Feature-based pricing: Different tiers offer varying levels of functionality. Common in traditional enterprise software. Basic monitoring might be affordable, but APM, log management, and security features add significant costs.
User-based pricing: Cost scales with the number of users accessing the platform. Can be economical for small teams but expensive as you scale. Often combined with other pricing models.
Hybrid models: Most vendors in 2026 use combinations of these approaches. Datadog, for example, charges per host plus per GB for logs plus per container.
Pro tip: Always request a detailed quote and understand the "all-in" cost, including data retention, features, and support, before committing to a commercial solution. Ask about costs at 2x and 5x your current scale to avoid surprises. Many vendors offer significant discounts for annual contracts versus month-to-month billing.
How to Choose the Right Open Source Monitoring Tool
Defining Your Monitoring Objectives
Before diving into specific tools, clearly define what you need to monitor. Are you focused on network devices, cloud-native applications, bare-metal servers, or a hybrid environment? What are your primary concerns: uptime, performance, security, or a combination?
Ask yourself these questions:
- What is the cost of downtime for different services? (This determines alerting priorities)
- How many servers/containers do you need to monitor? (Affects scalability requirements)
- What is your team's expertise level? (Influences tool complexity tolerance)
- Do you need metrics, logs, traces, or all three? (Determines tool selection)
- What compliance requirements do you have? (May require specific features or data residency)
- How long do you need to retain data? (Affects storage requirements)
Evaluating Technical Requirements and Team Expertise
Consider your team's existing skill set. If your team is already proficient with Kubernetes and comfortable with YAML configurations, Prometheus and Grafana might be a natural fit. If you need a more all-encompassing solution with less configuration overhead and have traditional infrastructure, Zabbix could be a better choice.
Technical considerations:
- Infrastructure type: Kubernetes environments favor Prometheus; mixed environments favor Zabbix
- Scale: Thousands of hosts require careful architecture regardless of tool choice
- Integration requirements: What systems need to send data to or receive alerts from your monitoring?
- Data retention: Long-term storage (beyond 6 months) requires additional components for Prometheus
- High availability: Do you need redundant monitoring infrastructure?
Team expertise considerations:
- Learning curve tolerance: Can your team invest weeks in learning a new system?
- Operational capacity: Who will maintain the monitoring infrastructure?
- On-call burden: More complex tools may generate more false positives initially
The Importance of Community and Documentation
A strong, active community and comprehensive documentation are invaluable for open-source tools. They provide support, troubleshooting resources, and a steady stream of improvements and plugins.
Evaluate community health by:
- GitHub activity (commits, issues, pull requests)
- Stack Overflow questions and quality of answers
- Active forums or Slack/Discord communities
- Frequency of releases and security updates
- Number and quality of third-party integrations
- Availability of training resources and tutorials
In 2026, Prometheus has one of the most active communities with over 3,000 exporters available. Grafana's community has created over 10,000 dashboard templates. This ecosystem dramatically reduces implementation time.
Comparison of On-Premise vs. Cloud-Hosted Monitoring Solutions
The decision between self-hosted and cloud-hosted monitoring significantly impacts operations, costs, and capabilities.
On-Premise (Self-Hosted) Solutions:
Advantages:
- Maximum control over data and security—critical for regulated industries
- No data egress costs or concerns about third-party access
- Customization freedom—modify source code if needed
- Predictable costs (hardware and personnel, not per-host fees)
- Works in air-gapped or highly restricted networks
Disadvantages:
- Requires significant hardware investment and capacity planning
- Your team maintains the monitoring infrastructure (who monitors the monitors?)
- Scaling requires hardware procurement and configuration
- Your team responsible for security updates and patches
- Disaster recovery requires additional planning and infrastructure
- Initial setup time measured in weeks, not hours
Cloud-Hosted (SaaS) Solutions:
Advantages:
- Faster time to value—often monitoring within hours
- Scalability handled by the vendor
- No infrastructure to maintain or secure
- Automatic updates and new features
- Often more cost-effective initially
- Built-in redundancy and disaster recovery
- Access from anywhere without VPN
Disadvantages:
- Data resides with third party (compliance concerns)
- Ongoing costs that scale with usage
- Vendor lock-in with proprietary agents and formats
- Less customization flexibility
- Dependent on vendor's uptime and security
- Data egress costs can be significant
- Internet connectivity required
Hybrid Approach: Many organizations in 2026 use a hybrid model—self-hosted Prometheus for internal metrics with cloud-based Grafana Cloud for visualization, or open-source tools for most monitoring with commercial SaaS for external uptime checks.
Practical Implementation: Monitoring Key Server Metrics with Open Source Tools
Let's walk through setting up a complete monitoring stack using Prometheus, Grafana, and Alertmanager. This implementation provides production-ready monitoring for a small to medium infrastructure.
Setting Up Prometheus for Metrics Collection
This section provides a step-by-step guide to installing and configuring Prometheus on a Linux server (Ubuntu/Debian-based, but similar for other distributions).
Installing Prometheus
First, create a dedicated user for Prometheus and download the latest version:
# Create prometheus user
sudo useradd --no-create-home --shell /bin/false prometheus

# Create directories
sudo mkdir /etc/prometheus
sudo mkdir /var/lib/prometheus

# Set ownership
sudo chown prometheus:prometheus /etc/prometheus
sudo chown prometheus:prometheus /var/lib/prometheus

# Download Prometheus (check for latest version)
cd /tmp
wget https://github.com/prometheus/prometheus/releases/download/v2.48.0/prometheus-2.48.0.linux-amd64.tar.gz
tar xvfz prometheus-2.48.0.linux-amd64.tar.gz
cd prometheus-2.48.0.linux-amd64

# Move binaries
sudo cp prometheus promtool /usr/local/bin/
sudo chown prometheus:prometheus /usr/local/bin/prometheus
sudo chown prometheus:prometheus /usr/local/bin/promtool

# Move config files
sudo cp -r consoles /etc/prometheus
sudo cp -r console_libraries /etc/prometheus
sudo chown -R prometheus:prometheus /etc/prometheus/consoles
sudo chown -R prometheus:prometheus /etc/prometheus/console_libraries
Create the Prometheus configuration file:
sudo nano /etc/prometheus/prometheus.ymlBasic configuration:
global:
  scrape_interval: 15s
  evaluation_interval: 15s

alerting:
  alertmanagers:
    - static_configs:
        - targets:
          # - alertmanager:9093

rule_files:
  # - "first_rules.yml"
  # - "second_rules.yml"

scrape_configs:
  - job_name: 'prometheus'
    static_configs:
      - targets: ['localhost:9090']
Create a systemd service file:
sudo nano /etc/systemd/system/prometheus.service[Unit]
Description=Prometheus
Wants=network-online.target
After=network-online.target
[Service]
User=prometheus
Group=prometheus
Type=simple
ExecStart=/usr/local/bin/prometheus \
--config.file /etc/prometheus/prometheus.yml \
--storage.tsdb.path /var/lib/prometheus/ \
--web.console.templates=/etc/prometheus/consoles \
--web.console.libraries=/etc/prometheus/console_libraries
[Install]
WantedBy=multi-user.targetStart Prometheus:
sudo systemctl daemon-reload
sudo systemctl start prometheus
sudo systemctl enable prometheus
sudo systemctl status prometheus
Access Prometheus UI at http://your-server-ip:9090. You should see the Prometheus interface with the status page showing the Prometheus server itself as a target.
Configuring Node Exporter
Node Exporter exposes machine metrics that Prometheus can scrape. Install it on every server you want to monitor:
# Download Node Exporter
cd /tmp
wget https://github.com/prometheus/node_exporter/releases/download/v1.7.0/node_exporter-1.7.0.linux-amd64.tar.gz
tar xvfz node_exporter-1.7.0.linux-amd64.tar.gz

# Move binary
sudo cp node_exporter-1.7.0.linux-amd64/node_exporter /usr/local/bin/
sudo chown prometheus:prometheus /usr/local/bin/node_exporter
Create a systemd service:
sudo nano /etc/systemd/system/node_exporter.service[Unit]
Description=Node Exporter
Wants=network-online.target
After=network-online.target
[Service]
User=prometheus
Group=prometheus
Type=simple
ExecStart=/usr/local/bin/node_exporter
[Install]
WantedBy=multi-user.targetStart Node Exporter:
sudo systemctl daemon-reload
sudo systemctl start node_exporter
sudo systemctl enable node_exporter
sudo systemctl status node_exporter
Node Exporter now exposes metrics on port 9100. Test with:
curl http://localhost:9100/metricsYou'll see hundreds of metrics including CPU, memory, disk, and network statistics.
Scrape Configuration in Prometheus
Update Prometheus to scrape Node Exporter metrics:
sudo nano /etc/prometheus/prometheus.ymlAdd a new job:
scrape_configs:
  - job_name: 'prometheus'
    static_configs:
      - targets: ['localhost:9090']

  - job_name: 'node_exporter'
    static_configs:
      - targets: ['localhost:9100']
        labels:
          instance: 'server1'
For multiple servers, add them to the targets list:
  - job_name: 'node_exporter'
    static_configs:
      - targets:
        - 'server1.example.com:9100'
        - 'server2.example.com:9100'
        - 'server3.example.com:9100'
Reload Prometheus:
sudo systemctl reload prometheusVerify targets in the Prometheus UI under Status → Targets. All should show "UP" status.
Visualizing Metrics with Grafana
Grafana provides beautiful dashboards for visualizing Prometheus metrics.
Installing Grafana
# Add Grafana repository
sudo apt-get install -y software-properties-common
sudo add-apt-repository "deb https://packages.grafana.com/oss/deb stable main"
wget -q -O - https://packages.grafana.com/gpg.key | sudo apt-key add -

# Install Grafana
sudo apt-get update
sudo apt-get install -y grafana

# Start Grafana
sudo systemctl daemon-reload
sudo systemctl start grafana-server
sudo systemctl enable grafana-server
sudo systemctl status grafana-server
Access Grafana at http://your-server-ip:3000. Default credentials are admin/admin (you'll be prompted to change on first login).
Connecting Grafana to Prometheus
- Click the gear icon (Configuration) → Data Sources
- Click "Add data source"
- Select "Prometheus"
- Set URL to
http://localhost:9090(or your Prometheus server IP) - Click "Save & Test"
You should see "Data source is working" confirmation.
Importing Pre-built Dashboards
Rather than building dashboards from scratch, import community dashboards:
- Click the "+" icon → Import
- Enter dashboard ID
1860(Node Exporter Full dashboard) - Click "Load"
- Select your Prometheus data source
- Click "Import"
You now have a comprehensive dashboard showing CPU, memory, disk, and network metrics for all servers running Node Exporter.
Recommended dashboard IDs for common scenarios:
- 1860: Node Exporter Full (comprehensive server metrics)
- 11074: Node Exporter for Prometheus Dashboard (alternative layout)
- 3662: Prometheus 2.0 Overview (Prometheus server stats)
- 7362: Kubernetes Cluster Monitoring (if using Kubernetes)
Setting Up Alerts with Prometheus Alertmanager
Alertmanager handles alerts sent by Prometheus, including grouping, routing, and sending notifications.
Installing Alertmanager
# Download Alertmanager
cd /tmp
wget https://github.com/prometheus/alertmanager/releases/download/v0.26.0/alertmanager-0.26.0.linux-amd64.tar.gz
tar xvfz alertmanager-0.26.0.linux-amd64.tar.gz

# Move binaries
sudo cp alertmanager-0.26.0.linux-amd64/alertmanager /usr/local/bin/
sudo cp alertmanager-0.26.0.linux-amd64/amtool /usr/local/bin/
sudo chown prometheus:prometheus /usr/local/bin/alertmanager
sudo chown prometheus:prometheus /usr/local/bin/amtool

# Create directories
sudo mkdir /etc/alertmanager
sudo mkdir /var/lib/alertmanager
sudo chown prometheus:prometheus /etc/alertmanager
sudo chown prometheus:prometheus /var/lib/alertmanager
Create Alertmanager configuration:
sudo nano /etc/alertmanager/alertmanager.ymlglobal:
resolve_timeout: 5m
route:
group_by: ['alertname', 'instance']
group_wait: 10s
group_interval: 10s
repeat_interval: 12h
receiver: 'email-notifications'
receivers:
- name: 'email-notifications'
email_configs:
- to: '[email protected]'
from: '[email protected]'
smarthost: 'smtp.gmail.com:587'
auth_username: '[email protected]'
auth_password: 'your-app-password'Create systemd service:
sudo nano /etc/systemd/system/alertmanager.service[Unit]
Description=Alertmanager
Wants=network-online.target
After=network-online.target
[Service]
User=prometheus
Group=prometheus
Type=simple
ExecStart=/usr/local/bin/alertmanager \
--config.file=/etc/alertmanager/alertmanager.yml \
--storage.path=/var/lib/alertmanager
[Install]
WantedBy=multi-user.targetStart Alertmanager:
sudo systemctl daemon-reload
sudo systemctl start alertmanager
sudo systemctl enable alertmanager
Defining Alerting Rules
Create alert rules file:
sudo nano /etc/prometheus/alert_rules.ymlgroups:
- name: server_alerts
interval: 30s
rules:
- alert: HighCPUUsage
expr: 100 - (avg by(instance) (irate(node_cpu_seconds_total{mode="idle"}[5m])) * 100) > 80
for: 5m
labels:
severity: warning
annotations:
summary: "High CPU usage on "
description: "CPU usage is above 80% (current value: %)"
- alert: LowDiskSpace
expr: (node_filesystem_avail_bytes{mountpoint="/"} / node_filesystem_size_bytes{mountpoint="/"}) * 100 < 10
for: 5m
labels:
severity: critical
annotations:
summary: "Low disk space on "
description: "Disk space is below 10% (current value: %)"
- alert: HighMemoryUsage
expr: (1 - (node_memory_MemAvailable_bytes / node_memory_MemTotal_bytes)) * 100 > 90
for: 5m
labels:
severity: warning
annotations:
summary: "High memory usage on "
description: "Memory usage is above 90% (current value: %)"
- alert: ServerDown
expr: up == 0
for: 1m
labels:
severity: critical
annotations:
summary: "Server is down"
description: " has been down for more than 1 minute"Update Prometheus configuration to use these rules:
sudo nano /etc/prometheus/prometheus.ymlUpdate the alerting and rule_files sections:
alerting:
  alertmanagers:
    - static_configs:
        - targets:
          - localhost:9093

rule_files:
  - "alert_rules.yml"
Reload Prometheus:
sudo systemctl reload prometheusCheck alerts in Prometheus UI under Alerts. Trigger a test alert by stopping Node Exporter on a monitored server—you should receive an email within a few minutes.
Advanced Monitoring Concepts: Logs, Traces, and Observability
The Evolution of Monitoring: From Metrics to Observability
In 2026, the concept of "observability" has largely superseded traditional monitoring. Observability is about understanding the internal state of a system by examining its outputs, which include logs, metrics, and traces—often called the "three pillars of observability."
Traditional monitoring answers "Is there a problem?" Observability answers "What is the problem and why is it happening?" This shift is critical for modern distributed systems where issues often stem from complex interactions between services rather than simple resource exhaustion.
The key differences:
- Monitoring is about known failure modes with predefined dashboards and alerts
- Observability enables exploration of unknown-unknowns through rich, high-cardinality data
Log Aggregation and Analysis
Logs provide detailed context about application behavior, errors, and user actions. However, managing logs across hundreds of servers presents significant challenges.
Challenges:
- Volume: Modern applications generate 50-100 GB of logs daily per server
- Distribution: Logs scattered across many servers make correlation difficult
- Structure: Unstructured text logs are hard to search and analyze
- Retention: Storage costs for long-term log retention can be substantial
Tools for Log Management:
Elasticsearch, Logstash, Kibana (ELK Stack): The traditional standard for log aggregation. Logstash collects and parses logs, Elasticsearch stores and indexes them, Kibana provides visualization and search.
Grafana Loki: A more recent alternative designed to work with Prometheus and Grafana. Loki doesn't index log contents (only metadata), making it more cost-effective for high-volume environments.
Commercial alternatives: Datadog Log Management, Splunk, Sumo Logic offer managed log platforms with advanced analytics.
Example - Searching logs across multiple servers:
# Traditional approach (painful)
for server in server1 server2 server3; do
  ssh $server "grep 'ERROR' /var/log/app.log"
done

# With centralized logging (simple)
# In Kibana or Loki: query "ERROR" across all logs instantly
Note: Structured logging (JSON format) dramatically improves searchability. Instead of parsing "User john logged in at 2026-03-02 14:23:01", log {"user": "john", "action": "login", "timestamp": "2026-03-02T14:23:01Z"}.
Distributed Tracing
Distributed tracing tracks requests as they flow through multiple services in a microservices architecture. Each service adds timing information, creating a complete picture of request processing.
What it solves:
- A request touches 15 microservices and takes 3 seconds. Which service is slow?
- An error occurs in Service C, but the root cause is invalid data from Service A
- Understanding dependencies between services
Tools:
- Jaeger: Open-source distributed tracing platform from Uber
- Zipkin: Another popular open-source option
- Commercial APM tools: Datadog APM, New Relic, Dynatrace include tracing
How it works:
- A request enters your system and receives a unique trace ID
- Each service the request touches adds a "span" with timing data
- All spans share the trace ID, allowing reconstruction of the complete request path
- Visualization shows which services added latency
Implementing tracing requires application instrumentation—adding code to propagate trace context. In 2026, many frameworks include tracing support out-of-the-box.
Analysis of AI/ML Integration in Modern Server Monitoring Tools
Modern tools are increasingly leveraging AI and machine learning for capabilities that go beyond simple threshold-based alerting.
Anomaly Detection: Traditional monitoring requires setting thresholds (alert if CPU exceeds 80%). But what if normal CPU usage varies by time of day, day of week, or follows seasonal patterns? AI-driven anomaly detection learns normal behavior and alerts on deviations, even if they don't cross fixed thresholds.
Example: Your API typically handles 1,000 requests/minute during business hours and 100 requests/minute overnight. Traditional monitoring might alert if requests drop below 500. AI-based monitoring understands the daily pattern and alerts if overnight traffic suddenly jumps to 500 (potentially indicating abuse) or business-hours traffic drops to 700 (potentially indicating a problem).
Predictive Analytics: ML models can forecast future issues based on historical data. Disk usage growing linearly? The system predicts when you'll run out of space and alerts proactively. Memory usage increasing gradually? Get alerted before the out-of-memory killer strikes.
Root Cause Analysis: When an incident occurs, AI can correlate events across logs, metrics, and traces to suggest probable causes. Instead of manually checking if the database slowdown caused the API latency spike, the system automatically identifies the correlation and suggests the database as the root cause.
Alert Noise Reduction: AI can group related alerts, suppress duplicate notifications, and learn which alerts are actionable versus noise. This addresses one of the biggest challenges in monitoring—alert fatigue.
In 2026, these capabilities have matured significantly. Tools like Datadog's Watchdog, New Relic's Applied Intelligence, and even open-source projects like Prometheus with Thanos and Grafana's ML plugins provide sophisticated AI-driven insights.
Warning: AI/ML is not magic. It requires training data (typically weeks to months) and can produce false positives. Use AI as a complement to, not replacement for, well-designed threshold-based alerts for critical systems.
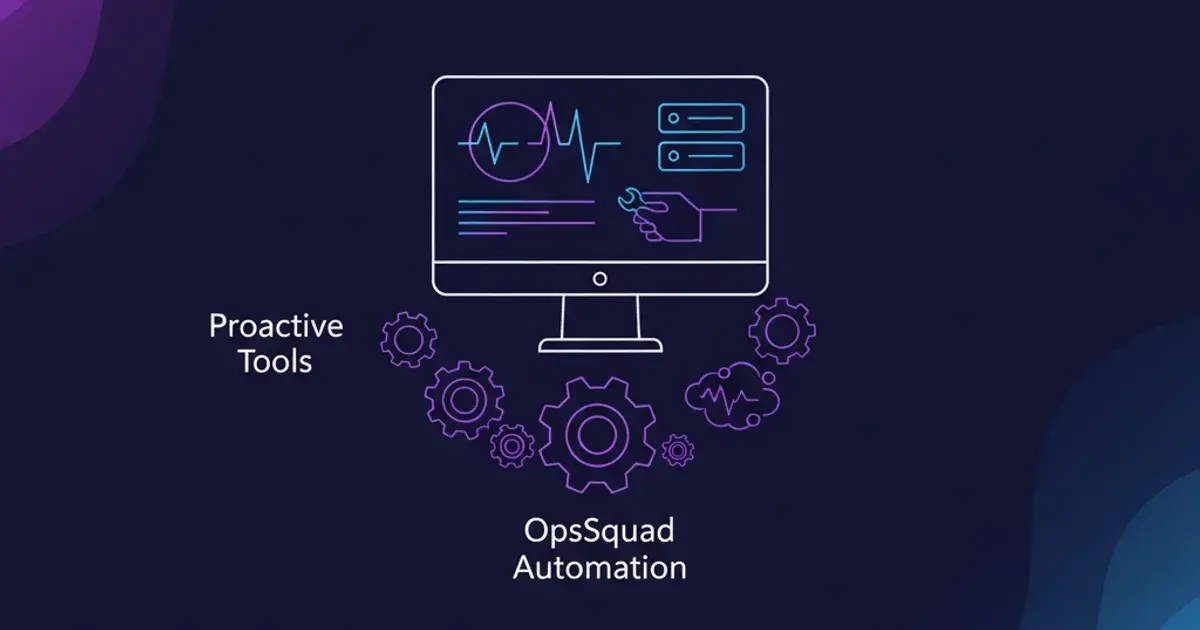
Skip the Manual Work: How OpsSqad Automates Server Monitoring Debugging
You've just learned numerous commands for checking server health, analyzing metrics, and digging through logs—top, free, iostat, grep, netstat, and many more. While essential for understanding the fundamentals, manually executing these commands across multiple servers and troubleshooting complex issues can be time-consuming and error-prone.
Consider a typical scenario: You receive a Prometheus alert that one of your production servers has high CPU usage. Your debugging process might look like this:
- SSH to the server (find credentials, possibly VPN in)
- Run
topto identify the consuming process - Check if it's a known process or something unusual
- Examine logs with
grepto find related errors - Check disk space with
df -hin case logs are filling up - Review network connections with
netstatto see if there's unusual traffic - Document findings and remediation steps
- Repeat for each server experiencing issues
This process takes 10-15 minutes per server, requires deep Linux knowledge, and is repetitive. What if you could simply ask an AI agent: "Why is server-prod-03 showing high CPU usage?" and get an answer in 90 seconds?
The OpsSqad Approach: Reverse TCP Architecture for Seamless Access
OpsSqad offers a revolutionary approach to server management and debugging, allowing you to leverage AI agents to perform these tasks for you, securely and efficiently. OpsSqad's unique reverse TCP architecture eliminates the need for inbound firewall rules or complex VPN configurations.
You install a lightweight OpsSqad node on your server, which initiates a secure, outbound connection to the OpsSqad cloud. This allows our AI agents to execute commands remotely, providing you with instant access to your infrastructure without exposing your servers to direct external access.
Key security features:
- Command whitelisting: Agents can only execute pre-approved commands
- Sandboxed execution: Commands run in isolated contexts
- Audit logging: Every command execution is logged with full context
- No inbound ports: Your firewall remains closed to incoming connections
- Encrypted communication: All data transmitted over TLS
Your 5-Step Journey to Effortless Server Debugging with OpsSqad
1. Create Your Free Account and Deploy a Node:
Visit app.opssquad.ai to sign up for a free account. Navigate to the "Nodes" section and click "Create Node." Give your node a descriptive name like "production-web-server-01" or "monitoring-server-us-east."
The dashboard displays your unique Node ID and authentication token—you'll need these for installation.
2. Deploy the OpsSqad Agent:
Access your server via SSH and execute the installation commands using your Node ID and token from the dashboard:
# Download and run the installer
curl -fsSL https://install.opssquad.ai/install.sh | bash

# Install the node with your credentials
opssquad node install --node-id=node_abc123xyz --token=tok_secure_token_here

# Start the node
opssquad node start
The node establishes an outbound connection to OpsSqad cloud. Within seconds, your dashboard shows the node as "Connected" with a green status indicator.
3. Browse Squad Marketplace:
In the OpsSqad dashboard, navigate to the Squad Marketplace. Browse available Squads—pre-configured teams of AI agents specialized for different tasks:
- K8s Troubleshooting Squad: Agents specialized in Kubernetes debugging
- Security Squad: Agents focused on security analysis and hardening
- WordPress Squad: Agents for WordPress performance and troubleshooting
- Performance Squad: Agents for system performance analysis
Find the relevant Squad for your needs (for server monitoring, the "Performance Squad" is ideal) and click "Deploy Squad." This creates your private instance with all agents configured.
4. Link Agents to Nodes:
Open your deployed Squad and navigate to the "Agents" tab. You'll see several specialized agents like "CPU Analyzer," "Memory Diagnostics," and "Log Inspector."
Click "Manage Access" and grant agents permission to execute commands on your nodes. This explicit permission model ensures agents only access servers you've authorized.
5. Start Debugging:
Navigate to chat.opssquad.ai, select your Performance Squad, and start chatting with AI agents that can execute real commands on your infrastructure.
Example conversation:
You: "Server production-web-01 is showing high CPU usage in Prometheus. Can you investigate?"
CPU Analyzer Agent: "I'll check the CPU usage on production-web-01. Executing top -bn1 | head -20..."
[Agent executes command and analyzes output]
CPU Analyzer Agent: "I found the issue. The process node (PID 8472) is consuming 78% CPU. This appears to be your Node.js application. Let me check the logs for errors."
[Agent executes journalctl -u myapp -n 50 --no-pager]
CPU Analyzer Agent: "The logs show repeated errors: 'ECONNREFUSED connecting to database'. Your application is stuck in a connection retry loop. The database service appears to be down. Checking database status..."
[Agent executes systemctl status postgresql]
CPU Analyzer Agent: "PostgreSQL is inactive (dead). The service crashed 23 minutes ago. Would you like me to attempt a restart?"
You: "Yes, please restart it and verify the application recovers."
CPU Analyzer Agent: "Executing sudo systemctl start postgresql... PostgreSQL started successfully. Monitoring application CPU usage... CPU has dropped to 12%, which is normal. Issue resolved. I've documented the incident in the audit log."
This entire interaction took 90 seconds. The manual approach would have taken 10-15 minutes and required you to remember multiple commands, interpret outputs, and correlate findings.
The Time Savings Are Real
What took 15 minutes of manual SSH sessions, command execution, and log analysis now takes 90 seconds via chat. More importantly, you can debug multiple servers simultaneously by asking the Squad to check all nodes, something impossible when SSHing manually.
For teams managing dozens or hundreds of servers, OpsSqad transforms monitoring from a reactive, time-consuming process into a proactive, conversational experience. Your Prometheus alerts can even trigger OpsSqad investigations automatically, with agents diagnosing issues before you even see the alert.
Frequently Asked Questions
What is the difference between server monitoring and server observability?
Server monitoring traditionally focuses on collecting predefined metrics and alerting when they cross thresholds, answering "Is there a problem?" Server observability, the modern approach in 2026, provides deeper insight by combining metrics, logs, and traces to answer "What is the problem and why is it happening?" Observability enables exploration of unknown issues through high-cardinality data, while monitoring addresses known failure modes with predefined alerts.
How much does server monitoring cost in 2026?
Server monitoring costs vary dramatically based on approach. Open-source solutions like Prometheus and Grafana have no licensing costs but require personnel time for setup and maintenance (typically 20-40 hours initially, 5-10 hours monthly ongoing). Commercial SaaS solutions range from $15-50 per host monthly for basic infrastructure monitoring, with comprehensive observability platforms (including APM, logs, and traces) costing $100-300 per host monthly at scale. A typical 100-server deployment runs $5,000-15,000 monthly for commercial solutions.
What are the most important server metrics to monitor?
The most critical server metrics to monitor are CPU utilization and load average (indicating processing capacity), memory usage and swap activity (revealing memory pressure), disk I/O and space utilization (identifying storage bottlenecks), network throughput and error rates (detecting connectivity issues), and application-specific metrics like request rates and error percentages (measuring user impact). In 2026, effective monitoring also includes security metrics such as failed login attempts and unusual process activity.
Should I choose open-source or commercial monitoring tools?
Choose open-source monitoring tools like Prometheus, Grafana, or Zabbix if you have strong DevOps expertise, need complete control over data and customization, want to avoid per-host licensing costs, or have specific compliance requirements for data residency. Choose commercial tools like Datadog or New Relic if you need faster time to value with minimal configuration, want integrated platforms combining metrics, logs, and traces, prefer dedicated support with SLAs, or lack in-house expertise for maintaining monitoring infrastructure. Many organizations use hybrid approaches in 2026.
How does AI improve server monitoring in 2026?
AI and machine learning enhance server monitoring through anomaly detection that learns normal patterns and alerts on deviations rather than fixed thresholds, predictive analytics that forecast issues before they occur (like disk space exhaustion), automated root cause analysis that correlates events across logs, metrics, and traces to identify problem sources, and alert noise reduction that groups related alerts and suppresses duplicates. These capabilities reduce mean time to resolution by up to 67% compared to traditional threshold-based monitoring.
What is distributed tracing and why does it matter?
Distributed tracing tracks individual requests as they flow through multiple services in microservices architectures, with each service adding timing information to create a complete picture of request processing. This matters because modern applications in 2026 often involve 10-20 services per request, making it impossible to identify performance bottlenecks or error sources without end-to-end visibility. Tracing answers questions like "which of these 15 services is adding 2 seconds of latency?" that metrics and logs alone cannot solve.
Conclusion
Server monitoring in 2026 is a sophisticated discipline that extends far beyond simple uptime checks. By understanding key metrics like CPU, memory, disk I/O, and network performance, implementing robust monitoring tools like Prometheus and Grafana, and embracing modern observability practices with logs and traces, you can maintain healthy infrastructure and prevent costly downtime. The choice between open-source and commercial tools depends on your team's expertise, budget, and specific requirements, but the fundamental principles remain the same: collect comprehensive data, alert intelligently, and respond quickly.
If you want to automate this entire workflow and transform hours of manual debugging into 90-second conversations with AI agents, OpsSqad provides the solution. Our reverse TCP architecture, specialized AI Squads, and secure command execution platform let you manage infrastructure through natural language instead of SSH sessions. Create your free account at app.opssquad.ai and experience the future of server management today.